BEA15 – Speeding up Your Book Blog
This post was originally delivered as a presentation at the Bloggers Conference, Book Expo America 2015 as part of the panel “Optimizing your WordPress Blog”. You can download the powerpoint presentation, but I have included a more comprehensive guide below, which includes verbal infomation not written on the slides.
Speeding Up Your Book Blog
This may seem intuitive, but there are a ton of bookblogs out there that have really bad page speed times. Especially for those less technologically secure, a bloated blog can be a problem. But there are some really important reasons why you should try and streamline your blog as much as possible.
For one, Google actually takes it into account when displaying you in Google results; particularly in mobile search, Google is trying to encourage faster load times. Nobody wants to wait 10 seconds for a page to load on dodgy 3G signal while out and about. In fact, Google actually recommends mobile site speeds of under 1 second – and that’s quite an ask.
Furthermore, 75% of users leave a page if it hasn’t loaded in 4 seconds. So there are definitely incentives to make sure your blog loads as fast as you can make it. And at the end of the day, fast page load times can only be a good thing. Nobody is gonna leave your site because it’s too fast!
How can we improve?
So what are the solutions?
Your first thought might be better hosting. And this is true; a faster host WILL speed up your blog. But the problem is that better hosting can often be quite costly, and most of us aren’t exactly swimming in cash.
What you might not know is that there are several great FREE solutions to improve your blog. These include:
- Content Deliverry Networks or CDNs
- Site Caching
- Removing bloated content and plugins
I’m going to show you how to use these three things to improve your page loads by a considerable amount.
Content Delivery Networks
The problem with a normal server is that it’s located in one place: somewhere in the world there’s a computer with all your site files on. Let’s say it’s in LA. That’s all right for the residents of California; they’re quite close to the server, so data packages and requests don’t have to travel as far to get to their computer. But if you live in NYC or worse still, London, all your website stuff has to travel across half the world to reach it’s readers. And that takes time.
The solution is a content delivery network – a network of servers across the globe that all have your important (static) files such as image files and stylesheets. This means that the data requests only have to travel as far as the nearest server – so if there’s a server in Dublin, Ireland, then as a Londoner, you’re in luck; you don’t have to wait as long a you used to for all the data to travel your way.
I’m going to show you how to set up a CDN for your blog with Cloudflare. They have a free option and are pretty easy to use. According to CloudFlare, your site will:
- Loads 2x faster
- Use 60% less bandwidth
- Have 65% fewer requests
- Be way more secure
- My own book blog, ThirstForFiction lost a couple of seconds of load time – and that can mean a lot.
Step-by-step Cloudflare guide
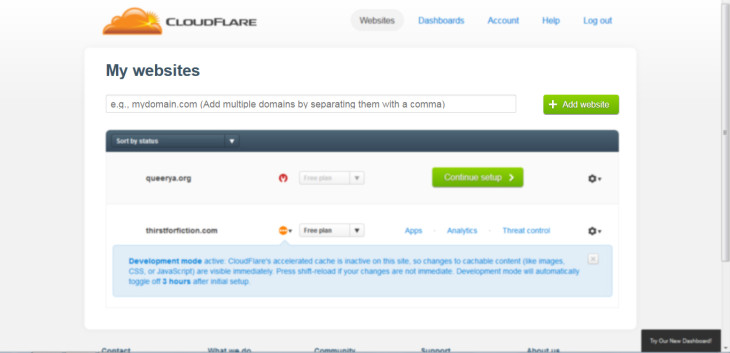
Step 1: enter your domain name and click “add website”
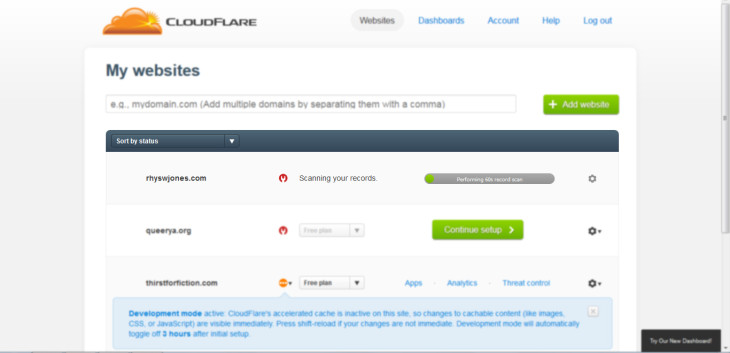
Step 2: Cloudflare takes about a minute to scan your DNS records/site
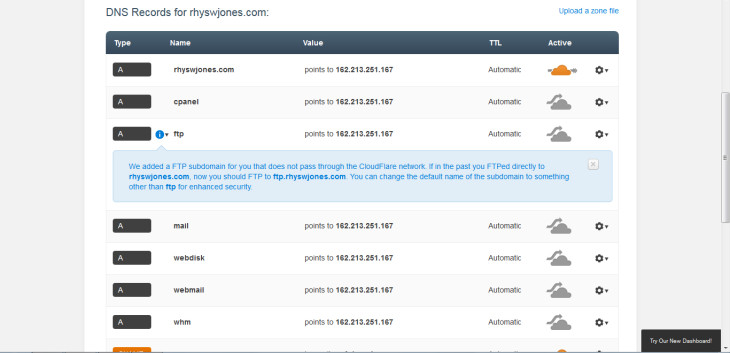
Step 3: select records you want to have on Cloudflare. Normally, the default settings are perfect – you can see here that the domain rhyswjones.com is ‘active’. Unless you have specific subdomains or subsites, just go with what they provide.
If you know you have extra DNS records, you can add them here.
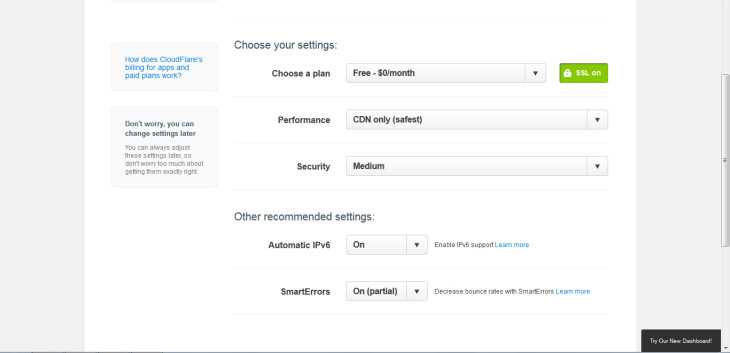
Step 4: choose your settings. Make sure you select the free option – it’ll try and make you purchase one – and then use the default settings.
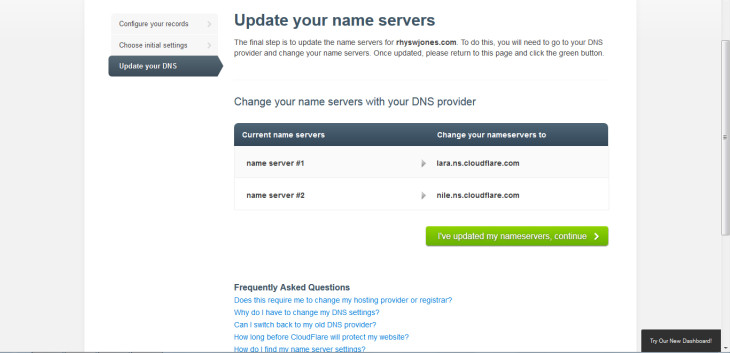
The last step is to change your nameservers with your domain name company. It’s quite easy and if you’re not sure how to do this with your company, you should be able to find a tutorial with them or use their support.
Voila! Faster site!
Once that’s all done, it can take up to 24 hours for everything to take effect. And voila! Your site should be a lot faster.
But there’s more we can do…
W3 Total Cache
This plugin is arguably the best caching plugin, though there are a couple more you can use.
Caching means that common server requests (ie. For an image) are stored in an easy-accessible place – either on the server or in the browser itself. It minimises the amount of requests each page load requires, speeding up site load by a couple of seconds.
W3 Total Cache itself is a large plugin with loads of options that I don’t want to go through here; WPBeginner have a great resource about the recommended settings you can use.
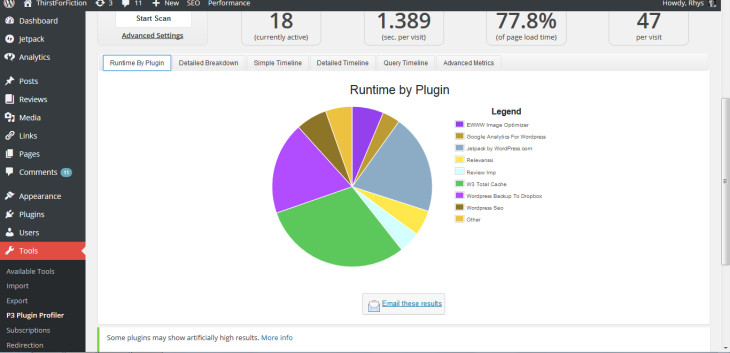
P3 Plugin Performance Profiler
This nifty little plugin is great because it tells you how much time each plugin you have activated adds to your page load. It’s a useful too if you have too many plugins and want to declutter a little, or if you think a particular plugin is hogging your resources.
Once it’s installed just start a scan. The results look something like this; you can see that my installed plugins add about 1.4 seconds to my page time. Eek!
EWWW Image Optimizer
As book bloggers, our blogs are often full of cover images which can often lead to slow load times. To minimise this without losing any content (though in some cases, losing content by limiting posts per page, for example, is worthwhile), you can compress and optimise images. With EWWW Image Optimizer, you can optimise all image files quickly and easily. There’s also a “cloud” version for people who don’t have access to PHP commands or don’t have the resources to process all their images.